|
|
On this page you will find some
pictures and a detailed description of the sequence of
events that took place during the Log Cabin build. Click on
any of the pictures to see a larger image.
|
|
|
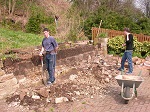 |
The Log Cabin was going to be
placed on the banking opposite my House so we needed to
demolish a retaining wall ready for the excavation of the
banking. I have employed, Ronny, a local digger driver to
excavate the space needed for the Log Cabin. |
|
|
|
|
|
|
|
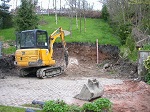 |
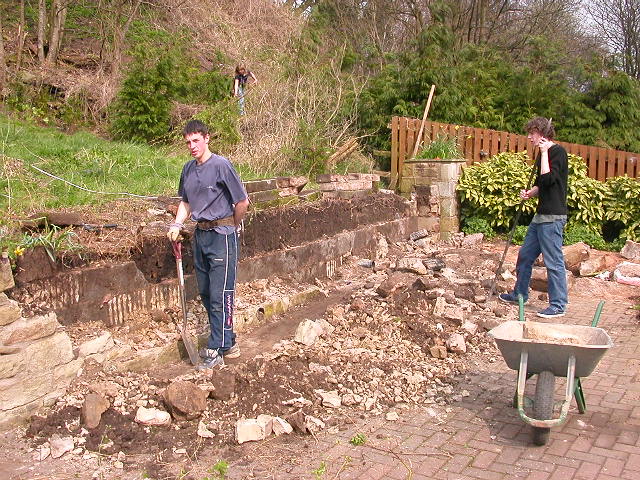
Ronny will excavate for the Log
Cabin during the week whilst I am traveling. He calls me to
say that there is a problem, he has hit solid bed rock and
his digger is not capable of removing it. The only option
will be to hire a mini digger with a hydraulic pecker to
break up the bedrock. |
|
|
|
|
|
|
|
 |
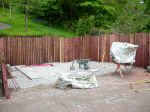
So Ronny agrees that he will
hire one and let me do the work the next weekend. he also
leaves his trailer so that once the rock has been broken up
I can load it into the trailer. Luckily its a fine weekend
and I enjoy every minute of using the hydraulic pecker.
Never used one before so it was a great learning for me. |
|
|
|
|
|
| |
 |
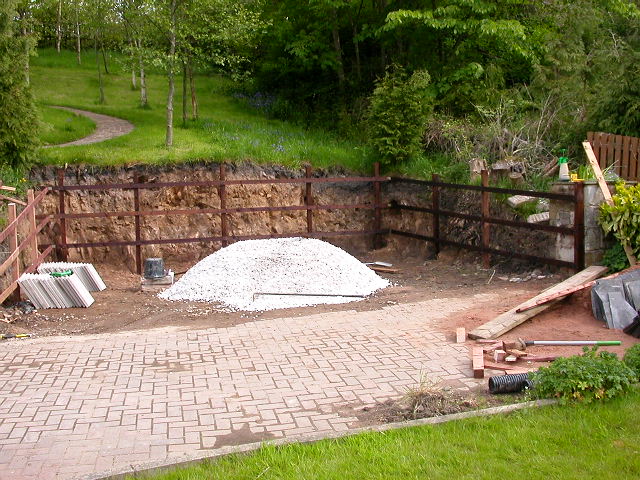
There had to be a lot of
excavation work before I could lay the base for the Log
Cabin. I had decided that the best base was going to be
concrete paving stones levelled with a sand/cement mix over
a limestone chip base. This will allow water to drain away
easily. This shows the 3 ton pile of limestone. |
|
|
|
|
|
| |
 |
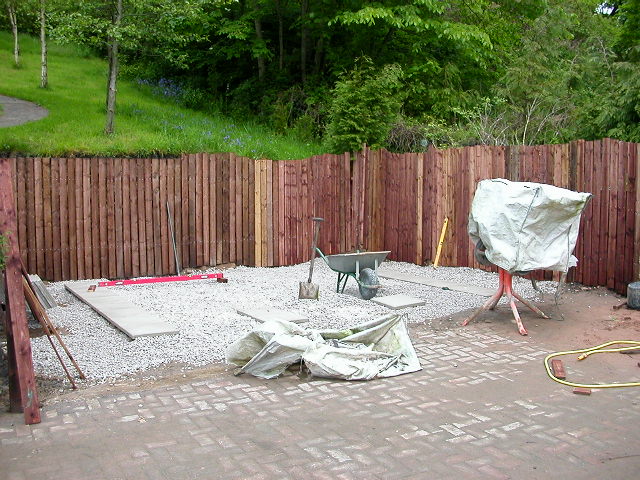
Tools required to lay the paving
stones. Cement mixer (makes life easier) borrowed from a
neighbour, long spirit level and a laser level. It is
essential that the paving stones are perfectly level and
laid in the correct place. I had decided that 4 lines of 8
pavings (450mm x 450mm) would support the bearers correctly. |
|
|
|
|
|
| |
 |
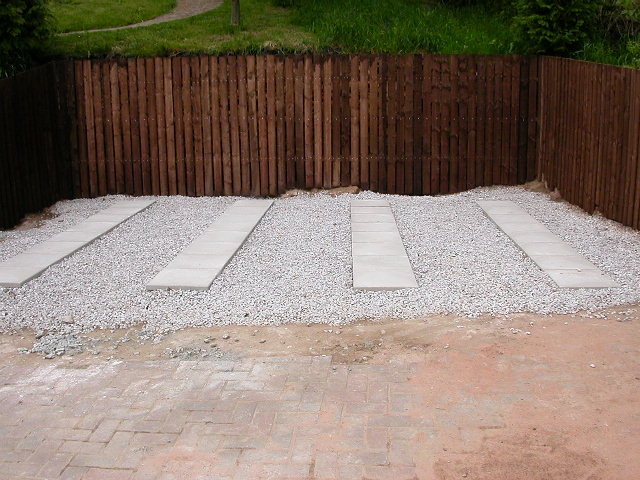
Base complete and awaiting the
arrival of the log cabin. The fence has been erected to hide
the rough finish of the ground that has been dug out. |
|
|
|
|
|
| |
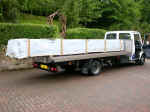 |
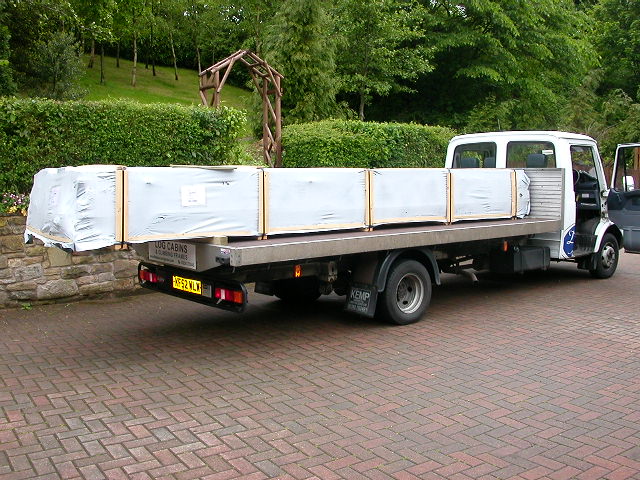
This is the Glastonbury Log
Cabin arriving. I cheated by asking the local farmer to
forklift the log cabin package off the truck. Otherwise it
would have been a manual job in unloading it. The driver
will assist you and it would take about 90 minutes and 3
cups of coffee. |
|
|
|
|
|
| |
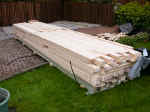 |
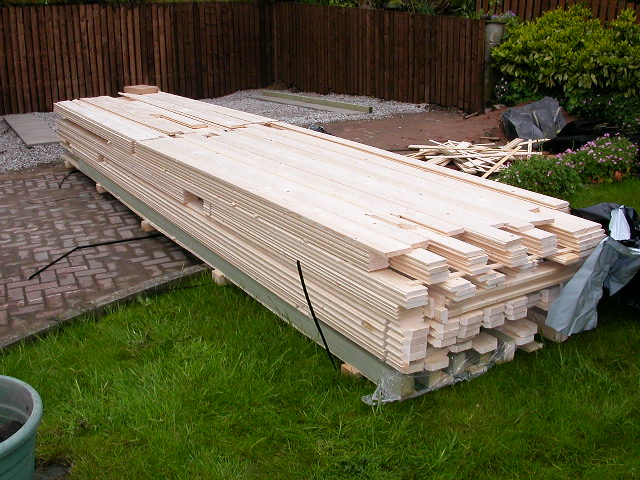
The only problem with taking the
log cabin off with a forklift is that the pressure treated
bearers that you need first are on the bottom of the
package. So I had to manually sort the timbers into correct
piles ready for the construction of the cabin. I am already
impressed with the quality of the timber, absolutely first
class. |
|
|
|
|
|
| |
 |
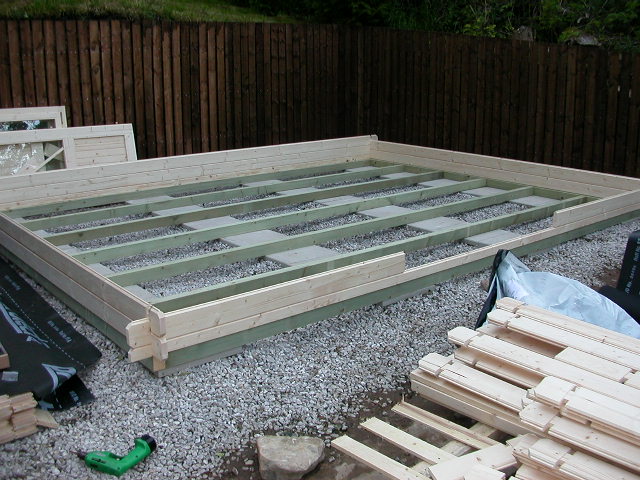
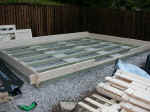
What a good start, the pressure
treated bearers actually fit the base and everything seems
level. I was a little worried that the pavings might not
support the cabin but the base feels very solid. |
|
|
|
|
|
| |
 |
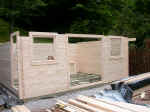
The logs for the walls are
perfectly notched so that they slot into each other at the
corner. The cabin logically fits together so that reading
the instructions was only needed when you hit a snag. That's
always my problem, I am too eager to build and do not have
the time to read the instructions. |
|
|
|
|
|
| |
 |
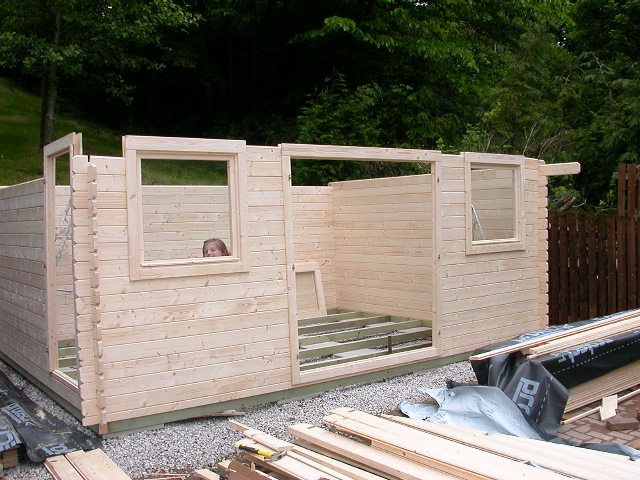
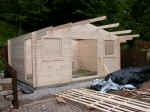
An hour or so later and the
cabin is really taking shape. Everything so far has fit
perfectly and it feels a really solid structure. The hardest
part so far has been fitting the door on the left hand side
of the cabin. This was an extra door that we ordered and the
logs had to be cut to allow the door to be inserted. |
|
|
|
|
|
| |
 |
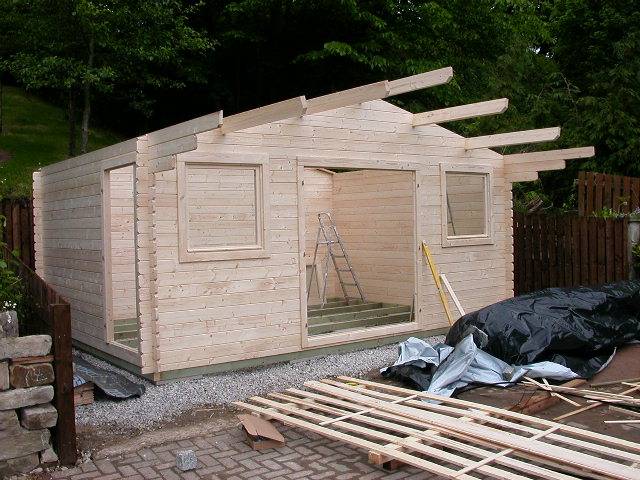
Really happy now that the
complete shape of the cabin can be seen. Note that the
pallet is now empty of timber, the roof and floor timber is
stored under rainproof covers ready for installing. The
floor will be the last timber to be installed so that it
does not get dirty footprints all over it. |
|
|
|
|
|
| |
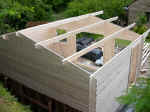 |
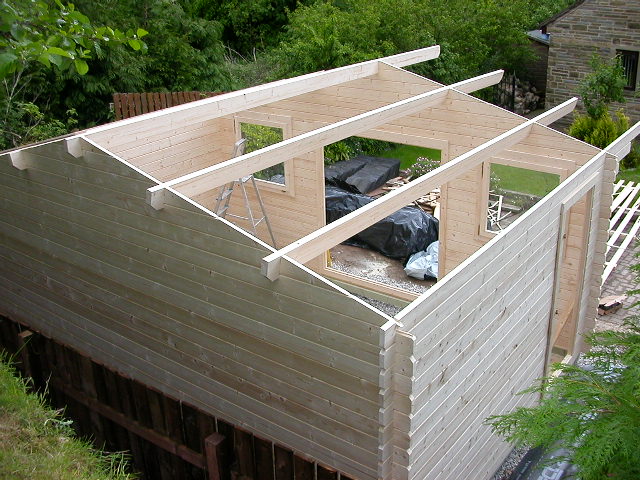
The roof bearers are now in
place and they are a lot stronger than I expected them to
be. I want to put natural Welsh Blue slate on the roof and
was unsure if the roof could take the weight but now I have
no worries. |
|
|
|
|
|
| |
 |
Continuing with the roof, needs
to be watertight before the weekend ends because I will not
be able to work on it until next weekend. |
|
|
|
|
|
| |
 |
Late Sunday evening it is
watertight. The roofing felt is a temporary covering until I
can fit the battens and slates. |
|
|
|
|
|
| |
 |
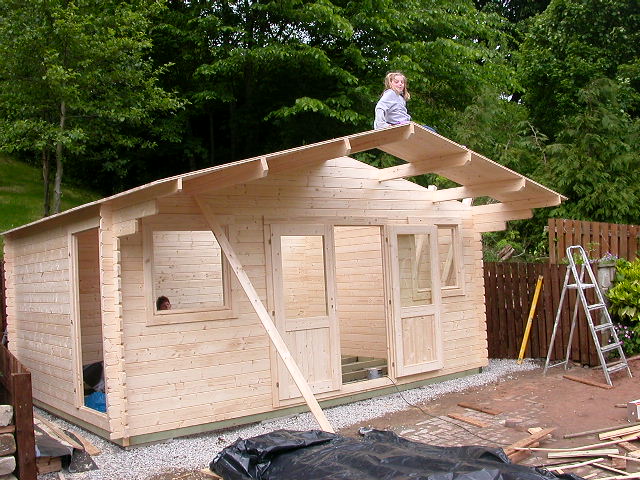
My wife has been busy all week
coating the timbers with a clear wood preserver and 2 coats
of Sikkens wood stain. Its been good to get the wood treated
without getting too wet. I have opted for an optional
veranda, you can just spot the veranda base fitted. |
|
|
|
|
|
|
|
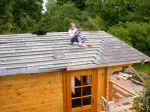 |
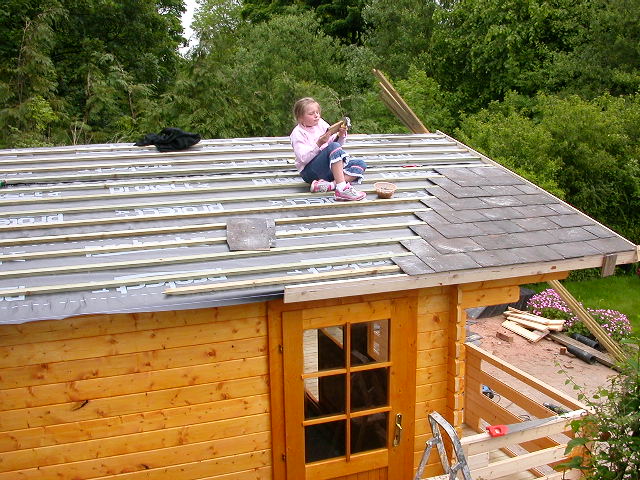
Now time to slate the roof.
Never slated a roof before so I hope that I can figure out
how to do it. The slate lathes have been purchased from a
local builders merchants, underfelt came from Screwfix and
the Welsh Blue Slate was purchased on ebay. |
|
|
|
|
|
|
|
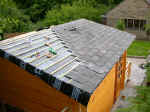 |
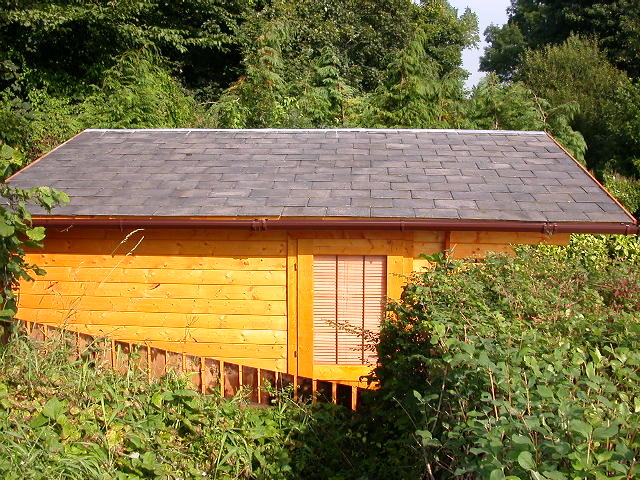
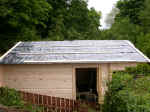
The slate is looking great, it
matches the slate on the house quite well. The plan for the
Log Cabin was to use it as a store room but because of the
real quality of finish we have (my wife) decided to use it
as a play room for our daughter and a workshop for me. |
|
|
|
|
|
|
|
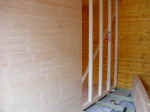 |
We now need to partition the
area to make 2 rooms, that is why I purchased the extra
door, to allow entry to the 2 rooms. The partition is made
from timber studding and 75mm pine matchboard from B&Q. This
made a really sturdy partition and you cannot see that it
was additional. |
|
|
|
|
|
|
|
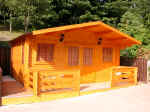 |
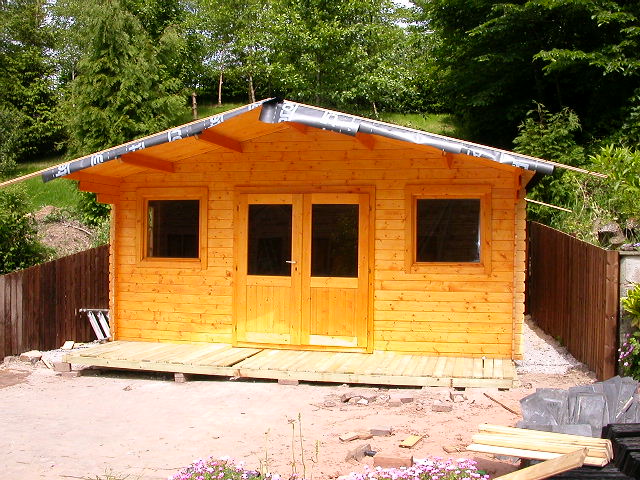
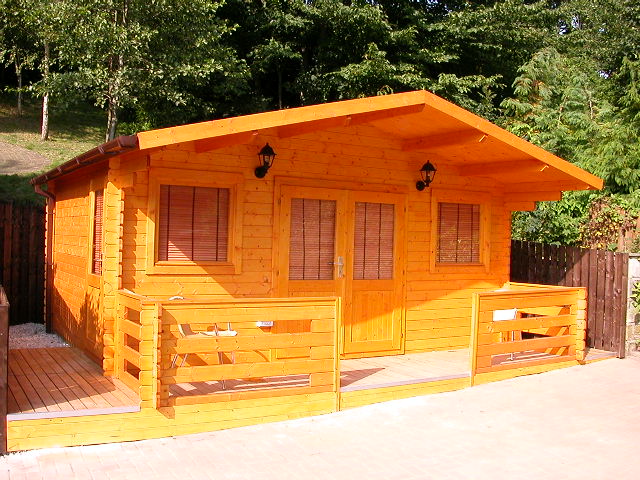
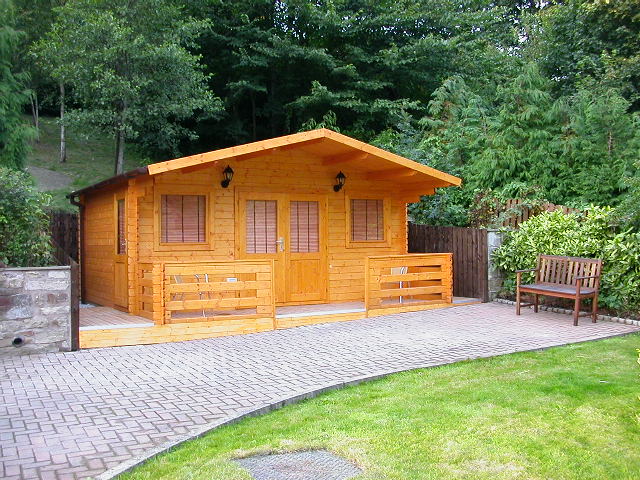
Now a few pictures of the
finished Glastonbury Log Cabin. Stunning. I was so impressed
by the quality of the timber, the design and the ease of
building that I now sell these Log Cabins as well. |
|
|
|
|
|
|
|
 |
You will see that I have
installed a guttering on this side of the cabin. It stops
rain from wetting you when you use the door. Guttering and
downpipe was purchased at Wickes DIY. |
|
|
|
|
|
|
|
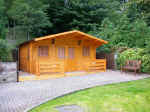 |
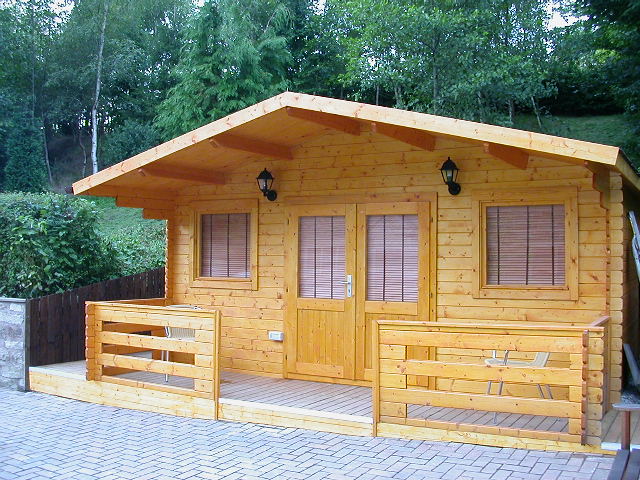
An electrical supply has been
installed, with a consumer unit feeding the interior lights,
sockets and exterior lights. The veranda is now finished and
it provides a wonderful area to sit and "chill" in the late
afternoon/early evening. Window blinds add to the finish. |
|
|
|
|
|
|
|
 |
We just about finished our Log
Cabin. Hope that you will get as much joy out of your log
cabin build. The finished cabin has made a wonderful play
room for our daughter and we have slept in there on certain
occasions. |
|
|
|